[Raku PDF Project]
/ PDF::API6

PDF::API6 - A Raku PDF API
- NAME
- DESCRIPTION
- EXAMPLE
- SYNOPSIS
- SECTION I: Input/Output Methods (inherited from PDF)
- SECTION II: Content Methods (role PDF::Content::API)
- SECTION III: PDF::API6 Specific Methods
- APPENDIX
PDF::API6 - Facilitates the creation and modification of PDF files
DESCRIPTION
A Raku PDF module; reminiscent of Perl 5’s PDF::API2.
This module is a work in progress in replicating, or mapping the functionality of Perl 5’s PDF::API2 tool-chain.
EXAMPLE
use v6;
use PDF::API6;
use PDF::Page;
use PDF::XObject::Image;
use PDF::Content::FontObj;

my PDF::API6 $pdf .= new;
$pdf.media-box = [0, 0, 200, 100];
my PDF::Page $page = $pdf.add-page;
constant Padding = 10;

$page.graphics: {
    enum <x0 y0 x1 y1>;
    my PDF::Content::FontObj $font = $pdf.core-font: :family<Helvetica>, :weight<bold>, :style<italic>;
    my @box = .say: 'Hello, world', :$font, :position[10, 10];

    my PDF::XObject::Image $img = .load-image: "t/images/lightbulb.png";
    .do: $img, :position[@box[x1] + Padding, 10];
}

$pdf.save-as: "tmp/hello-world.pdf";

SYNOPSIS
use PDF::API6;
# Create a blank PDF file
my PDF::API6 $pdf .= new();

# Open an existing PDF file
my PDF::API6 $pdf .= open('some.pdf');
my PDF::API6 $pdf .= new( :file<some.pdf> );

# Add a blank page
use PDF::Page;
my PDF::Page $page = $pdf.add-page();

# Retrieve an existing page
use PDF::Page;
my PDF::Page $page_2 = $pdf.page(2);

# Set the default page size for all pages
use PDF::Content::Page :PageSizes;
$pdf.media-box = A4;

# Set the size of a specific page
use PDF::Content::Page :PageSizes;
$page.media-box = Letter;

# Set a landscape page-size
use PDF::Content::Page :PageSizes, :&to-landscape;
$page.media-box = to-landscape(Letter);

# Use a standard PDF core font
use PDF::Content::FontObj;
constant FontObj = PDF::Content::FontObj;
my FontObj $font = $pdf.core-font('Helvetica-Bold');
$font = $pdf.core-font: :family<Helvetica>, :weight<Bold>;

# Add an external TrueType font to the PDF
# (requires PDF::Font::Loader module to be installed)
use PDF::Font::Loader;
$font = PDF::Font::Loader.load-font: :file</path/to/font.ttf>;
# (requires both PDF::Font::Loader and FontConfig modules)
$font = PDF::Font::Loader.load-font: :family<Vera>, :weight<Bold>;

# Add some text to the page
$page.text: {
    .font = $font, 20;
    .text-position = 200, 700;
    .say('Hello World!');
}

# Save the PDF
$pdf.save-as('/path/to/new.pdf');
SECTION I: Input/Output Methods (inherited from PDF)
Input/Output
new
Creates a new PDF object.
my PDF::API6 $pdf .= new();
#...
dd $pdf.Str;
$fh.write: $pdf.Blob;

$pdf = PDF::API6.new();
#...
$pdf.save-as('our/new.pdf');
open
Opens an existing PDF or JSON file.
my PDF::API6 $pdf .= open('our/old.pdf');
#...
$pdf.save-as('our/new.pdf');

# open from a stream
my PDF::API6 $pdf2 .= open($pdf.Blob);
Open an encrypted document:
PDF::API6.open( "enc.pdf", :password<sshh!> );
Open a PDF, ignoring indices and stream lengths:
PDF::API6.open( "damaged-or-edited.pdf", :repair );
update
In-place update of a PDF file
my PDF::API6 $pdf .= open('our/to/be/updated.pdf');
#...
$pdf.update();
save-as
Save a new or updated PDF document to a file
my PDF::API6 $pdf .= new;
#...
$pdf.save-as: 'our/new.pdf';
The :preserve option (default True) keeps the original PDF structure, then applies incremental updates. This is generally faster and also ensures that digital signatures are not invalidated.
PDF::API6 $pdf .= open("our/original.pdf");
$pdf.save-as: 'our/updated.pdf', :!preserve;
The :rebuild option (default False) rewrites the PDF. This may be useful, if there have been a substantial number of updates.
The :compress option is used to ensure stream objects (which generally make up the bulk of a PDF) are compressed. This is useful when maximum compaction is needed.
PDF::API6 $pdf .= open("our/original.pdf");
$pdf.save-as: 'our/updated.pdf', :rebuild, :compress;
The reverse flag, :!compress is useful when you want to optimise for human-readability of the output PDF. It will uncompress Flate, LZW, ASCIIHex and ASCII85 encoded streams.
The :stream option writes the PDF file progressively, starting as early as possible.
A PDF file can also be saved as, and opened from an intermediate JSON representation, by saving to, or reading from, files with a .json extension
PDF::API6 $pdf .= new;
#...
$pdf.save-as: 'our/ast.json';
# ...
$pdf.open: 'our/ast.json';
encrypt
Encrypt a PDF:
$pdf.encrypt( :owner-pass<ssh1>, :user-pass<abc>, :aes );
is-encrypted
Check if document is encrypted
if $pdf.is-encrypted { ... }
Serialization Methods
Str, Blob
Return a binary representation of a PDF as a string, or binary Blob
my Str $pdf-byte-string = $pdf.Str; # returns a string of latin-1 characters
my blob8 $bytes = $pdf.Blob;         # returns a Blob[uint8]
ast
Return an AST tree representation of a PDF.
use PDF::IO::Writer;
my %cos = $pdf.ast;   # returns a nested Hash representation of the PDF
# write it to a file
my $pdf-byte-string = PDF::IO::Writer.new.write: |%cos;
"/tmp/out.pdf".IO.spurt(:bin, $pdf-byte-string);
SECTION II: Content Methods (role PDF::Content::API)
The methods in this section are performed by PDF::Lite and PDF::API6.
Pages
page-count
my UInt $pages = $pdf.page-count;
Returns the number of pages in a PDF.
page
use PDF::Page;
my PDF::Page $second-page = $pdf.page(2);
Returns the nth page from the PDF
iterate-pages
for $pdf.iterate-pages -> PDF::Page $page { ... }
my PDF::Page @all-pages = $pdf.iterate-pages;
my $page-iterator = $pdf.iterate-pages;
$page-iterator.pull-one for ^$pdf.page-count;
Returns an iterator that traverses all pages in sequence.
add-page
Synopsis: $pdf.add-page($page-object?)
my PDF::Page page = $pdf.add-page;
Adds a page to the end of a PDF. Creates a new blank page by default.
delete-page
Deletes a page, by page-number
my PDF::Page $moved-page = $pdf.delete-page(2);
# re-add the to the end of the PDF
$pdf.add-page($moved-page);
Page Methods
to-xobject
Converts a page to an XObject Form.
This is useful if you want to transpose the imported page somewhat differently onto a page (e.g. two-up, four-up, etc.), or include further graphics on the output page.
Example:
use PDF::API6;
use PDF::Page;
use PDF::XObject;
use PDF::Content;
my PDF::API6 $old .= open('our/old.pdf');
my PDF::API6 $pdf .= new;
my PDF::Page $page = $pdf.add-page;
my PDF::Content $gfx = $page.gfx;

# Import first page from the old PDF
my PDF::XObject $xo = $old.page(1).to-xobject;

# Add it to the new PDF's first page at 1/2 scale
my $width = $xo.width / 2;
my $bottom = 5;
my $left = 10;
$gfx.do($xo, :position[$bottom, $left], :$width);

$pdf.save-as('our/new.pdf');
images
Synopsis: my PDF::XObject::Image @images = $gfx.images: :inline;
This method extracts image objects for a given page, or other graphical element:
The :inline flag will include any image objects in the graphical content stream.
media-box, crop-box, trim-box, bleed-box, art-box, bleed
A page has several different bounding boxes:
crop-box– the region of the PDF that is displayed or printedmedia-box– width and height of the printed pagetrim-box– the intended dimensions of the finished pagebleed-box– the region to which the page contents needs to be clipped when output in a production environment.art-box– for general use
bleed is a convenience method for setting up or deriving a bleed gutter area surrounding the trim-box. It should usually be set up after the trim box.
Example:
use PDF::API6;
use PDF::Page;
use PDF::Content::Page :PageSizes;
sub postfix:<mm>(Numeric $v){ ($v * 2.83).round(1) };

my PDF::API6 $pdf .= new;
my PDF::Page $page = $pdf.add-page;

# set-up Letter-size trim-box with symmetrical 3mm bleed

$page.trim-box = Letter;
$page.bleed = 3mm;
##  $page.bleed = 3mm, 3mm, 3mm, 3mm; # same as above
say $page.bleed;     # (8 8 8 8)
say $page.trim-box;  # [0 0 612 792]
say $page.bleed-box; # [-8 -8 620 800]
rotate
$page.rotate = 90;
Read/write accessor to rotate the page, clockwise. Angles must be multiples of 90 degrees.
Graphics Constructor
gfx
Synopsis: $page.gfx: :&render, :!strict, :trace, :comment
Options:
- :&render install a rendering call-back (see Rendering below)
- :!strict turn off some warnings, regarding out-of-sequence operations,
incorrect nesting or un-closed Save, Text or Marked content blocks.
Debugging options:
- :trace print debugging information to $*ERR
- :comment write explanatory comments into the content stream, including
operator mnemonics and original un-encoded text. These may make it a bit
easier for developers to interpret the content stream within the PDF. Note
that setting both :comment and :trace options will direct the trace output
output to the content stream as comments.
Graphics form the basis of PDF rendering and display. This includes text, images, graphics, colors and painting.
Pages, XObject Forms and Tiling Patterns all perform the PDF::Content::Canvas role, and have associated graphics of type PDF::Content. These can be accessed by the.gfx method.
use v6;
use PDF::API6;
use PDF::Content::Canvas;
use PDF::Content;

my PDF::API6 $pdf .= open("tmp/hello-world.pdf");
# dump existing graphics on page 1
my PDF::Content::Canvas $page = $pdf.page(1);
my PDF::Content $gfx = $page.gfx;

# add some more text to the page
$gfx.font = $pdf.core-font: :family<Courier>;
$gfx.text: {
    .text-position = (10, 30);
    .say("Demo added text");
}
dd $gfx.content-dump; # dump added graphics operations
See also Patterns and XObject Forms which also have associated graphics.
Text Methods
The text method enables the construction of flowing text.
The print can then be used to add text to a line. The say methods adds text then advances to the start of the next line.
use PDF::API6;
use PDF::Content::FontObj;
use PDF::Page;

my PDF::API6 $pdf .= new;
my PDF::Content::FontObj $header-font = $pdf.core-font: :family<Helvetica>, :weight<bold>;
my PDF::Content::FontObj $body-font = $pdf.core-font: :family<Helvetica>;

my PDF::Page $page = $pdf.add-page;
my @curpos;
$page.gfx.graphics: -> $gfx {
    $gfx.text: {
        $gfx.say: 'My first novel', :position[10, 200], :font($header-font); # output a line
        $gfx.print: 'It was a dark and stormy', :font($body-font); # start a line
        $gfx.say: ' night.', :font($header-font); # finish it
        @curpos = $gfx.text-position.List; # save current position.
    }
}
There are a number of text variables (e.g. WordSpacing) and graphics variables (e.g. FillColor) that can be set to affect the appearance of the displayed text.
Please note that text variables and text-position are scoped to a text block. You will need to set them up again when starting a new text block.
text
Synopsis: $gfx.text: &block
This is a convenience method, that executes code in a text block. Text blocks cannot be nested. Nor can they contain a graphics block.
$page.text: {
    .text-position = 30, 50;
    .WordSpacing = 5;
    .say "hi";
}
is equivalent to:
given $page.gfx {
    .BeginText;
    .text-position = 30, 50;
    .WordSpacing = 5;
    .say "hi";
    .EndText;
}
Where BeginText and EndText are text graphics operators [1].
The following should only be used within a text block:
- text methods, such as:
font(),text-position()and text-transform() - text state variables: CharSpacing, WordSpacing, HorizScaling, TextLeading, TextRender, TextRise [1].
print() and say() can be used outside of a text block, but you
need to at least pass a :$font option and will likely need a :$text-position method (if the text is not at 0, 0 in current user coordinates).
[1] see Appendix I: Graphics / Text Operators.
font, core-font
$gfx.font = $pdf.core-font( :family<Helvetica>, :weight<bold>, :style<italic> );
$gfx.font = $pdf.core-font('Times-Bold');
$gfx.font = $pdf.core-font('ZapfDingbats');
Read/write accessor to set, or get the current font.
Note: other fonts can be loaded via the PDF::Font::Loader module:
use PDF::Font::Loader :load-font;
$gfx.font = load-font( :file</usr/share/fonts/truetype/tlwg/Garuda-BoldOblique.ttf> );
# Select a matching system font. This requires the FontConfig module
# to also be installed.
$gfx.font = load-font( :family<Garuda>, :weight<bold>, :slant<oblique> );
See also HarfBuzz::Subset, which can be used to subset fonts, reducing the size of PDF files.
use PDF::Font::Loader :load-font;
use FontConfig;
use HarfBuzz::Subset;
$gfx.font = load-font( :file</usr/share/fonts/truetype/tlwg/Garuda-BoldOblique.ttf>, :subset );
$gfx.font = load-font( :family<Garuda>, :weight<bold>, :slant<oblique>, :subset );
text-position
$page.text: {
    .text-position = 10,20;
    .say('text @10,20');
}
Gets or sets the current text output position. Origin (0, 0) is at the bottom left corner.
text-transform
Synopsis: $gfx.text-transform: :$matrix, :translate[$x,$y], :rotate($rad), :scale[$s, $sy?], :skew[$x,y];
Applies text transforms, such as translation, rotation, scaling, and skew.
$gfx.text-transform: :translate[110, 10], :rotate(.1);
-
Text transforms are applied after any Graphics Transform.
-
This replaces any existing text positioning or transforms.
base-coords
Synopsis:
my ($x-base, $y-base, ...) = $gfx.base-coords(
                           $x-trans, $y-trans, ...,
                           :$user=True,    # map to user default coordinates
                           :$text=False);  # un-map text matrix
Options:
-
:text- Treat as a text position on the page, i.e. un-transform against the currentTextMatrixbefore un-transforming against the graphics matrix (CTM). -
:!user- Treat at a text position relative to current graphics, i.e. un-transform only the currentTextMatrix
This method maps transformed pairs of x-y coordinates back to original coordinates.
$gfx.transform: :translate($x,$y), :scale(.8);
my @image-region = $gfx.do($my-image, :align<middle>, :position[20, 30]);
my @position-on-page = $gfx.base-coords(|@image-region);
user-coords
Synopsis:
my ($x-trans, $y-trans, ...) = $gfx.user-coords(
                           $x-base, $y-base, ...,
                           :$user=True,    # map to user default coordinates
                           :$text=False);  # un-map text matrix
This is the inverse function to base-coords and computes transformed coordinates from original coordinates.
$gfx.WordSpacing = 2; # add extra spacing between words
my $font = $pdf.core-font( :family<Helvetica>, :weight<bold> );
my $font-size = 16;
my $text = "Hello.  Ting, ting-ting. Attention! … ATTENTION! ";

my ($x0, $x1, $y1, $y1) = $gfx.print: $text, :$font, :$font-size, :width(120);

note "text block has size {$x1 - $x0} X {$y1 - $y0};
Synopsis: my @rect = print(
$text-str-or-chunks-or-box,
:align<left|center|right>, :valign<top|center|bottom>,
:baseline-shift<top|middle|bottom|alphabetic|ideographic|hanging>,
:position[x, y], :offset[dx, dy],
:$font, :$font-size,
:kern, :squish, :$leading, :$width, :$height,
:$margin-top, :$margin-right, :$margin-bottom, :$margin-left,
:$.WordSpacing, :$.CharSpacing, :$.HorizScaling, :$.TextRise
:shape, :direction<ltr|rtl>, :!bidi, :nl)
Renders a text string, or Text Box.
The optional Text::FriBidi module is required when:
- the
:direction<rtl>option is being used - the input text contains Unicode bidirectional control (BiDi) characters, and the
:!bidioption has not been used to disable BiDi processing.
The :shape option enables font shaping via HarfBuzz. This option works best when the font has been loaded via PDF::Font::Loader and the PDF::Font::Loader::HarfBuzz module has been installed.
Both the print and say methods may interpret a number of control and spacing characters, please see Appendix III: Text Block Special Characters for details.
say
Takes the same parameters as print. Sets the final text position ($.text-position) to the start of the next line.
Graphics Methods
These methods are applicable to objects that perform the PDF::Content::Canvas role: PDF::Page, PDF::XObject::Form, and PDF::Pattern::Tiling
graphics
Synopsis: $gfx.graphics: &block
This is a convenience method, that executes code in a nested Save/Restore block.
$page.graphics: {
    .Rectangle(10,20,100,50);
    .Fill;
}
is equivalent to:
given $page.gfx {
    .Save;
    .Rectangle(10,20,100,50);
    .Fill;
    .Restore;
}
transform
Synopsis: $gfx.transform: :$matrix, :translate[$x,$y], :rotate($rad), :scale[$s, $sy?], :skew[$x,y];
Applies a graphics transform, such as translation, rotation, scaling, etc.
$gfx.transform: :rotate(pi/4), :scale(2);
Unlike Text Transforms, Graphics Transforms accumulate; and are applied in addition to any existing transforms.
Text transforms are scoped to a graphics block.
paint
Synopsis: $gfx.paint( &block?, :close, :stroke, :fill, :even-odd)
paint is a general purpose method for closing, stroking and filling shapes.
paint takes an optional block which may contain operations
to set up the graphics state and ends with one or more path
construction operations:
use PDF::Content::Color :rgb;
# fill and stroke a colored rectangle

$gfx.paint: :fill, :stroke, {
    .FillColor = rgb(.7, .7, .9);
    .StrokeColor = rgb(.9, .5, .5);
    .LineWidth = 2.5; # set stroking line-width
    .Rectangle(0, 20, 100, 250);
}
The graphics state is saved and restored if the optional block is provided. The above example is equivalent to:
use PDF::Content::Color :rgb;
given $gfx {
    .Save;
    .FillColor = rgb(.7, .7, .9);
    .StrokeColor = rgb(.9, .5, .5);
    .LineWidth = 2.5; # set stroking line-width
    .Rectangle(0, 20, 100, 250);
    .FillStroke;
    .Restore;
}
Image Methods
load-image
Loads an image in a supported format (currently PNG, GIF and JPEG).
 my PDF::XObject::Image $img = $gfx.load-image("t/images/lightbulb.png");
 note "image has size {$img.width} X {$image.height}";
do
$gfx.do($img, :position[10, 20])
Synopsis: my Numeric @region[4] = $gfx.do(
$xobject, $x = 0, $y = 0,
:$width, :$height, :inline,
:align<left center right> = 'left',
:valign<top center bottom> = 'bottom')
Displays an XObject Image or Form.
XObject Forms
A Form is a graphical sub-element. Its usage is the same as an image.
XObject form construction is similar to pages; both perform the
PDF::Context::Graphics role, which provides methods such as
gfx, pre-gfx, graphics, text and render.
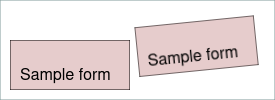
xobject-form
This graphical method is used to create a new, empty form object:
use v6;
use PDF::API6;
use PDF::Page;
use PDF::XObject::Form;
use PDF::Content::Color :rgb;

my PDF::API6 $pdf .= new;
my PDF::Page $page = $pdf.add-page;
$page.media-box = [0, 0, 275, 100];

# create a new XObject form of size 120 x 50
my @BBox = [0, 0, 120, 50];
my PDF::XObject::Form $form = $page.xobject-form: :@BBox;

$form.graphics: {
    # color the entire form
    .FillColor = rgb(.9, .8, .8);
    .Rectangle: |@BBox;
    .paint: :fill, :stroke;
}

$form.text: {
    # add some sample text
    .font = $pdf.core-font('Helvetica');
    .text-position = 10, 10;
    .say: "Sample form";
}

# display the form a couple of times
$page.graphics: {
    .transform: :translate(10, 10);
    .do($form);
    .transform: :translate(130, 0), :rotate(.1);
    .do($form);
}

$pdf.save-as: "tmp/sample-form.pdf";
Patterns
A Pattern is a graphical object. Its construction is similar to a form; its usage is the same as a color.
use PDF::API6;
use PDF::Pattern::Tiling;
use PDF::Content::Color :rgb;

my PDF::API6 $pdf .= new;
$pdf.media-box = [0, 0, 250, 100];
my $page = $pdf.add-page;

$page.graphics: -> $gfx {
    # create a new tiling pattern
    my PDF::Pattern::Tiling $pattern = $page.tiling-pattern(:BBox[0, 0, 25, 25], );
    $pattern.graphics: {
        .FillColor = rgb(.7, .7, .9);
        .Rectangle(|$pattern<BBox>);
        .Fill;
        my $img = .load-image("t/images/lightbulb.png");
        .do($img, :position[5, 5] );
    }
    # set our pattern as the fill color
    $gfx.StrokeColor = rgb(.3, .3, .9);
    $gfx.StrokeAlpha = .5;
    $gfx.FillColor = $gfx.use-pattern($pattern);

    $gfx.FillAlpha = .6; # semitransparent
    # create a couple of overlapping semi-transparent filled rectangles
    $gfx.Rectangle(30, 30, 110, 50);
    $gfx.paint: :fill, :stroke;

    $gfx.transform: :translate[50, 0], :rotate(.25);
    $gfx.Rectangle(30, 2, 110, 50);
    $gfx.paint: :fill, :stroke;
}
$pdf.save-as: "tmp/patterns.pdf";

Patterns are typically used to achieve textured colors or tiling effects.
tiling-pattern
Synopsis: my PDF::Pattern::Tiling $pattern = $gfx.tiling-pattern( :@BBox, :@Matrix, :$XStep, :$YStep, :$group = True)
Creates a new empty tiling pattern.
use-pattern
Synopsis: $gfx.FillColor = $gfx.use-pattern($pattern)
Use a pattern; registering it as graphics resource. This method should be used to place the pattern after it has been fully constructed.
Low Level Graphics
PDF::API6 fully supports the PDF graphics instruction set, both for reading and writing PDF files. Direct calls to instructions are camel-cased, such as:
$gfx.TextMove(10,20);
It is also possible to directly call the TextMove operator ‘Td’:
use PDF::Content::Ops :OpCode
$gfx.op(OpCode::TextMove, 10,20);
$gfx.op('Td', 10,20);  # TextMove
A number of graphics variables are tracked as the instructions are executed. For example, to set the line-width for stroking operations:
$gfx.LineWidth = 2.5;
This is equivalent to:
$gfx.SetLineWidth(2.5)
     unless $gfx.LineWidth == 2.5;
The Save and Restore operators may be used to save and restore graphics variables.
$gfx.LineWidth = 1.5;
$gfx.Save;
$gfx.LineWidth = 2.5;
#...
$gfx.Restore;
say $gfx.LineWidth; # 1.5
The graphics method simply adds Save and Restore operators
$gfx.LineWidth = 1.5;
$gfx.graphics: {
    .LineWidth = 2.5;
    #...
}
say $gfx.LineWidth; # 1.5
Basic Colors
The PDF Model maintains two separate color states; for filling and stroking.
They are applicable to general graphics as well as displayed text.
FillColor, FillAlpha
To set an RGB color for filling, or for displaying text:
$gfx.FillColorSpace = 'DeviceRGB';
$gfx.FillColorN = [1.0, .5, .5];
Alternatives:
$gfx.FillColor = :DeviceRGB[1.0, .5, .5];

use PDF::Content::Color :rgb;
$gfx.FillColor = rgb(1.0, .5, .5);
There are also Gray and CMYK color-spaces
$gfx.FillColor = :DeviceGray[.7];
$gfx.FillColor = :DeviceCMYK[.3, .2, .2, .15];

use PDF::Content::Color :gray, :cmyk;
$gfx.FillColor = gray(.7);
$gfx.FillColor = cmyk(.3, .2, .2, .15);
Also settable is the FillAlpha. This is a value between 0.0 (fully transparent) and
1.0 (fully opaque).
Note that FillAlpha can also be used to draw semi-transparent images:
$gfx.FillAlpha = .3;  # make the fill color semi-transparent
$gfx.Rectangle(10,10,50,75);
$gfx.Fill; # fill, semi-transparently
$gfx.do($image, 20,20);  # overlay image, semi-transparently
StrokeColor, StrokeAlpha
These are identical to FillColor, and FillAlpha, except that they are applied to stroking colors:
# draw a semi-transparent rectangle with red border
use PDF::Content::Color :rgb;
$gfx.StrokeAlpha = .5;  # make the stroke color semi-transparent
$gfx.StrokeColor = rgb(.9, .1, .1);
$gfx.Rectangle(10,10,50,75);
$gfx.Stroke;
Named Colors
The PDF::Content::Color :ColorName and color exports provide a selection of built in named colors.
- Aqua, Black, Blue, Fuchsia, Gray, Green, Lime, Maroon Navy, Olive Orange, Purple, Red, Silver, Teal, Yellow, Cyan, Magenta
A wider selection of named colors is available via the Color::Named module.
use PDF::Content::Color :ColorName, :color;
use Color::Named;
$gfx.FillColor = color Blue; # a PDF::Content named color
$gfx.StrokeColor = color Color::Named.new( :name<azure> );
Text Modes
By default text is drawn solidly using the current fill color. There are other text rendering modes that alter how text is stroked and filled. For example, the FillOutLineText rendering mode strokes the text using the current StrokeColor to a thickness determined by the current LineWidth then fills it using the current FillColor.
Setting the same FillColor and StrokeColor with TextMode::OutlineText
artificially increasing the font weight by LineWidth.
use v6;
use PDF::API6;
use PDF::Content::Color :ColorName, :color;
use PDF::Content::Ops :TextMode;

my PDF::API6 $pdf .= new;
$pdf.media-box = [0, 0, 200, 100];
my PDF::Page $page = $pdf.add-page;
my $font = $pdf.core-font( :family<Helvetica> );

$page.graphics: {
    .text: {
        .font = $font, 20;
        .FillColor = color Blue;
        .StrokeColor = color Red;
        .LineWidth = .6;

        .text-position = 10, 75;
        .say: "Filled/Solid";

        .TextRender = TextMode::OutlineText;
        .say: "Outlined";

        .TextRender = TextMode::FillOutlineText;
        .say: "Filled/Stroked";

        .StrokeColor = .FillColor;
        .LineWidth = 1;
        .say: "Bolded Text";
    }
}

$pdf.save-as: "tmp/text-render-modes.pdf";

See Appendix II: Enumerations - Text Rendering Modes
Rendering Methods
render: :&callback
This method is used to process graphics; normally after installing
callbacks. Callback invocations have access to the graphics state via
the $*gfx dynamic variable.
use PDF::API6;
use PDF::Content;
use PDF::Content::Ops :OpCode;
use PDF::Page;
my PDF::API6 $pdf .= open: "t/basic.pdf";
my PDF::Page $page = $pdf.page: 1;

my sub callback($op, *@args) {
   given $op {
       when TextMove|TextMoveSet|SetTextMatrix {
           note "Text matrix updated by $op to {$*gfx.TextMatrix}";
       }
   }
}

my PDF::Content $gfx = $page.render( :&callback);
html-canvas
The optional HTML::Canvas::To::PDF module needs to be installed before using this method. It adds a rendering back-end to enable HTML5 Canvas like graphics construction on Pages or XObject Forms (which perform the PDF::Content::Canvas role).
In this mode, fonts are registered via CSS:Font::Descriptor objects.
use PDF::API6;
use PDF::Content::Canvas;
use CSS::Font::Descriptor;

my PDF::API6 $pdf .= new;
my PDF::Content::Canvas $page = $pdf.add-page;
my CSS::Font::Descriptor $arial .= new: :font-family<arial>, :src<url(resources/font/FreeMono.ttf)>;
$page.html-canvas: :font-face[$arial], {
    .beginPath();
    .arc(95, 50, 40, 0, 2 * pi);
    .stroke();
    .font = "30px Arial";
    .fillText("Hello World", 10, 50);
}

$pdf.save-as: "tmp/html-canvas.pdf";
AcroForm Fields
PDF::API6 has some experimental abilities to read and manipulate AcroFields.
The individual fields are returned as PDF::Field sub-roles (see PDF::Class).
Displayed fields are also a subclass of PDF::Annot, most commonly PDF::Annot::Widget.
use PDF::API6;
use PDF::Field;
use PDF::Field::Button;
use PDF::Field::Choice;
use PDF::Field::Text;
use PDF::Field::Signature;
use PDF::Annot::Widget;

my PDF::API6 $pdf .= open: "t/pdf/OoPdfFormExample.pdf";
my PDF::Field @fields = $pdf.fields;
# display field names and values
for @fields -> $field {
    my $field-type = do given $field {
       when PDF::Field::Button { 'button' }
       when PDF::Field::Choice { 'button' }
       when PDF::Field::Text   { 'text' }
       when PDF::Field::Signature   { 'signature' }
       default { 'unknown' }
    }
    my $annot-type = do given $field {
       when PDF::Annot::Widget {'widget'}
       when PDF::Annot {'annot'}
       default {'hidden'}
    }
    say "{$field.key}: {$field.value} is of type $field-type $annot-type";
}
- The
fieldsmethod returns all fields in the PDF as an array. - The
fields-hashmethod returns fields hashed on each fields.key()value
There are also PDF::Page fields, and fields-hash methods that return all fields on a given page.
my PDF::API6 $pdf .= open: "my-form.pdf";
my PDF::Field @page-1-fields = $pdf.page(1).fields;
More work needs to be done in PDF::Class to fully support all possible field types;
SECTION III: PDF::API6 Specific Methods
Metadata Methods
info
use PDF::Info;
my PDF::Info $info := $pdf.info;
Gets/sets the info for the document
$pdf.info.Title = 'Some Publication';
Standard Info fields include: Title, Author, Subject, Keywords, Creator, Producer, CreationDate and ModDate.
xmp-metadata
Str $xml = $pdf.xmp-metadata;
Gets/sets the XMP XML data stream.
Example:
my $xml = q:to<EOT>;
    <?xpacket begin='' id='W5M0MpCehiHzreSzNTczkc9d'?>
    <?adobe-xap-filters esc="CRLF"?>
    <x:xmpmeta
      xmlns:x='adobe:ns:meta/'
      x:xmptk='XMP toolkit 2.9.1-14, framework 1.6'>
        <rdf:RDF
          xmlns:rdf='http://www.w3.org/1999/02/22-rdf-syntax-ns#'
          xmlns:iX='http://ns.adobe.com/iX/1.0/'>
            <rdf:Description
              rdf:about='uuid:b8659d3a-369e-11d9-b951-000393c97fd8'
              xmlns:pdf='http://ns.adobe.com/pdf/1.3/'
              pdf:Producer='Raku PDF::API6 version 0.0.1'></rdf:Description>
            </rdf:Description>
        </rdf:RDF>
    </x:xmpmeta>
    <?xpacket end='w'?>
    EOT

$pdf.xmp-metadata = $xml
Settings Methods
preferences
use PDF::Destination :Fit;
given $pdf.preferences {
    .HideToolBar = True;
    .OpenAction = $pdf.destination( :page(2), :fit(FitWindow), :name<intro> );
}
Controls viewing preferences for the PDF. Options are:
$prefs.PageMode = 'FullScreen'
Full-screen mode, with no menu bar, window controls, or any other window visible.
$prefs.PageMode = 'UseThumbs'
Thumbnail images visible.
$prefs.PageMode = 'UseOutlines'
Make document outlines visible.
$prefs.PageLayout = 'SinglePage'
Display one page at a time.
$prefs.PageLayout = 'OneColumn'
Display the pages in one column.
$prefs.PageLayout = 'TwoColumnLeft'
Display the pages in two columns, with odd numbered pages on the left.
$prefs.PageLayout = 'TwoColumnRight'
Display the pages in two columns, with odd numbered pages on the right.
$prefs.direction = 'r2l';
The predominant reading order for text:
-
l2rLeft to right -
r2lRight to left (vertical writing systems, such as Chinese, Japanese, and Korean)
$prefs.HideToolbar = True
Specifying whether to hide tool bars.
$prefs.HideMenubar = True
Specifying whether to hide menu bars.
$prefs.WindowUI = True
Specifying whether to hide user interface elements.
$prefs.CenterWindow = True
Specifying whether to position the document’s window in the center of the screen.
$prefs.DisplayDocTitle = True
Specifying whether the window’s title bar should display the document title taken from the Title entry of the document information dictionary.
$prefs.after-fullscreen = 'UseThumbs'
Thumbnail images visible after Full-screen mode.
$prefs.after-fullscreen = 'UseOutlines'
Document outline visible after Full-screen mode.
$prefs.PrintScaling = 'None'
Set the default print setting for page scaling to none.
$prefs.Duplex = 'Simplex'
Print single-sided by default.
$prefs.Duplex = 'DuplexFlipShortEdge'
Print duplex by default and flip on the short edge of the sheet.
$prefs.Duplex = 'DuplexFlipLongEdge'
Print duplex by default and flip on the long edge of the sheet.
`$prefs.OpenAction = $pdf.destination( :$page, :fit(FitWindow), :name);
Specifying the page (either a page number or a page object) to be displayed by a PDF viewer, plus one of the following options:
destination() Options:
Str :$name
Optional. See Named Destinations.
:fit(FitWindow)
Display the page designated by page, with its contents magnified just enough to fit the entire page within the window both horizontally and vertically. If the required horizontal and vertical magnification factors are different, use the smaller of the two, centering the page within the window in the other dimension.
:fit(FitHoriz), :$top
Display the page designated by page, with the vertical coordinate top positioned at the top edge of the window and the contents of the page magnified just enough to fit the entire width of the page within the window.
:fit(FitVert), :$left
Display the page designated by page, with the horizontal coordinate left positioned at the left edge of the window and the contents of the page magnified just enough to fit the entire height of the page within the window.
:fit(FitRect), :$left, :$bottom, :$right, :$top
Display the page designated by page, with its contents magnified just enough to fit the rectangle specified by the coordinates left, bottom, right, and top entirely within the window both horizontally and vertically. If the required horizontal and vertical magnification factors are different, use the smaller of the two, centering the rectangle within the window in the other dimension.
:fit(FitBoxHoriz), :$top
Display the page designated by page, with its contents magnified just enough to fit its bounding box entirely within the window both horizontally and vertically. If the required horizontal and vertical magnification factors are different, use the smaller of the two, centering the bounding box within the window in the other dimension.
:fit(FitBox)
Display the page designated by page, with the vertical coordinate top positioned at the top edge of the window and the contents of the page magnified just enough to fit the entire width of its bounding box within the window.
:fit(FitBoxVert), :$left
Display the page designated by page, with the horizontal coordinate left positioned at the left edge of the window and the contents of the page magnified just enough to fit the entire height of its bounding box within the window.
:fit(FitXYZoom), :$left, :$top, :$zoom
Display the page designated by page, with the coordinates (left, top) positioned at the top-left corner of the window and the contents of the page magnified by the factor zoom. A zero (0) value for any of the parameters left, top, or zoom specifies that the current value of that parameter is to be retained unchanged.
see also examples/pdf-preferences.raku
version
$pdf.version = v1.5;
Get or set the PDF Version
Color Management
color-separation
use PDF::API6;
use PDF::Content::Color :color;
use PDF::ColorSpace::Separation;
constant CS = PDF::ColorSpace::Separation;
my PDF::API6 $pdf .= new;
$pdf.add-page.graphics: -> $gfx {
    my CS $c = $pdf.color-separation('Cyan',    color '%f000');
    my CS $m = $pdf.color-separation('Magenta', color '%0f00');
    my CS $y = $pdf.color-separation('Yellow',  color '%00f0');
    my CS $k = $pdf.color-separation('Black',   color '%000f');

    # use a separation color directly
    my CS $pms023 = $pdf.color-separation('PANTONE 032CV', color '%0ff0');
    $gfx.FillColor = $pms023 => .75;
}
color-devicen
# create a DeviceN color-space for color mixing
use PDF::ColorSpace::DeviceN;
my PDF::ColorSpace::DeviceN $color-mix = $pdf.color-devicen( [ $c, $m, $y, $k, $pms023 ] );
# apply it
$gfx.FillColor = $color-mix => [0, 0, 0, .25, .75];
The current version of PDF::API6 only supports CMYK separations as DeviceN components.
Interactive Features
Outlines
Outlines (or bookmarks) are commonly used by viewers for navigation of PDF documents.
For example, the following sets up a simple table-of-contents that will typically appear in the navigation pane of a PDF viewer.
use PDF::API6;
my PDF::API6 $pdf .= new;
$pdf.add-page for 1 .. 7;
use PDF::Destination :Fit;

sub dest(|c) { :Dest($pdf.destination(|c)) }

$pdf.outlines.kids = [
          %( :Title('1. Purpose of this Document'), dest(:page(1), :name<chapt1>)),
          %( :Title('2. Pre-requisites'),           dest(:page(2), :name<chapt2>)),
          %( :Title('3. Compiler Speed-up'),        dest(:page(3), :name<chapt3>)),
          %( :Title('4. Recompiling the Kernel for Modules'), dest(:page(4)),
             :kids[
                %( :Title('5.1. Configuring Debian or RedHat for Modules'),
                   dest(:page(5), :fit(FitXYZoom), :top(798)) ),
                %( :Title('5.2. Configuring Slackware for Modules'),
                   dest(:page(5), :fit(FitXYZoom), :top(400)) ),
                %( :Title('5.3. Configuring Other Distributions for Module'),
                   dest(:page(5), :fit(FitXYZoom), :top(200)) ),
             ],
           ),
          %( :Title('Appendix'), dest(:page(7))),
         ];
See also: pdf-toc.raku, installed with PDF::Class. This can be used to view the outlines for a PDF.
Page Labels
Get or sets page numbers to identify each page number, for display or printing:
page-labels is an array of ascending integer indexes. Each is followed by a page numbering scheme. For example
constant PageLabel = PDF::API6::PageLabel;
$pdf.page-labels = 0  => 'i',   # Roman lowercase: i, ii, iii, ...
                   4  => '1',   # Plain Decimal Numbering: 1, 2, 3, ...
                  32  => 'A-1', # Decimal: A-1, A-2, ...
                  36  => 'B-1', # Decimal: B-1, B-2, ...
                  # equivalent to 'C-1'
                  40  => { :numbering-style(PageLabel::RomanUpper), :start(1), :prefix<C-> };
Annotations
An annotation associates a ‘clickable’ region on a page with an object such as a text note, destination page or URI. PDF::API6 currently supports a small number of commonly used annotations:
- Links
- pages within the PDF
- pages from another other PDF files
- external URIs
- File Attachments
- Text Annotations (or “sticky notes”)
Synopsis:
use PDF::Annot::Link;
use PDF::Annot::FileAttachment;
use PDF::Annot::Text;

my PDF::Annot::Link $page-link = $pdf.annotation: :$page, :$action, |%props;
my PDF::Annot::Link $dest-link = $pdf.annotation: :$page, :$destination, |%props;
my PDF::Annot::FileAttachment $attachment = $pdf.annotation: :$page, :$attachment, :icon-name<Paperclip|GraphPushPin>, :$text-label, |%props;
my PDF::Annot::Text $sticky-note = $pdf.annotation: :$page, :$content, :$Open, |%props;
Where:
%props {              # common annotation options
    :@color,          # color for the annotation 3 values
                      # (rgb), 1 value (gray) or 4 values (cmyk)
    :@rect, :$text,   # rectangle or text to print and highlight
    :$border-style,   # style the annotation border
}
Examples:
use v6;
use PDF::API6;
use PDF::Destination :Fit;
use PDF::Annot::Link;
use PDF::Content::Color :ColorName;
use PDF::Border :BorderStyle;
use PDF::Annot::Text;
use PDF::Filespec;
use PDF::Content;

my PDF::API6 $pdf .= new;

$pdf.add-page for 1 .. 2;

sub dest(|c) { :Dest($pdf.destination(|c)) }
sub action(|c) { :action($pdf.action(|c)) }

my PDF::Content $gfx = $pdf.page(1).gfx;
$gfx.text: {
    .font = $pdf.core-font: 'Times-Roman';

    #-- create a link from a region on Page 1 to Page 2 --
    .text-position = 377, 545;
    my PDF::Annot::Link $link = $pdf.annotation(
                     :page(1),
                     :text("see Figure-1 on page 2"),
                     |dest(:page(2), :name<figure-1>),
                     :color(Blue),
                 );

    #-- Link to an URI --
    .text-position = 377, 515;
    $link = $pdf.annotation(
                     :page(1),
                     :text("Raku"),
                     |action(:uri<https://raku.org>),
                     :color(Orange),
                 );

    #-- Link to a Page in another PDF --

    # display the annotation with a 2pt dashed border
    my $border-style = {
        :width(2),  # 2 point width
        # 3 point dashes, alternating with 2-point gaps
        :style(BorderStyle::Dashed),
        :dash-pattern[3, 2],
    };

    .text-position = 377, 485;
    $link = $pdf.annotation(
                     :page(1),
                     :text("Example PDF Form"),
                     |action(
                         :file<../t/pdf/OoPdfFormExample.pdf>,
                         :page(1), :fit(FitXYZoom), :top(400),
                     ),
                     :color(Green),
                     :$border-style,
                 );
}

#-- Create a Text annotation --
my Str $content = q:to<END-QUOTE>;
    To be, or not to be: that is the question: Whether 'tis
    nobler in the mind to suffer the slings and arrows of
    outrageous fortune, or to take arms against a sea of
    troubles, and by opposing end them?
END-QUOTE

my PDF::Annot::Text $note = $pdf.annotation(
             :page(1),
             :$content,
             :rect[ 377, 455, 455, 467 ],
             :color[0, 0, 1],
         );

#--  Add a File Attachment annotation
my PDF::Filespec $attachment = $pdf.attachment("t/images/lightbulb.png");
$content = 'Click on the paperclip to see an image as an example image attachment';
$pdf.annotation(
             :page(1),
             :$attachment,
             :text-label("Light Bulb"),
             :$content,
             :icon-name<Paperclip>,
             :rect[ 377, 395, 425, 412 ],
         );
Named Destinations
The destination() method (above), also accepts an optional :$name argument.
This causes the PDF to map names to destinations. So for example:
```
$pdf.destination: :page(99), :name<appendix-i-graphics>;
$pdf.save-as: "doc.pdf";
```
Is enough to create a named declaration. This may have several benefits in browsers and other third-party software:
-
major browsers support opening PDF’s to named declarations. For example, opening url “file://doc.pdf#appendix-i-graphics” will open the PDF at page 99.
-
PDF::API6 can then also locate pages by name:
$pdf.open("doc.pdf").page('appendix-i-graphics')will open page 99.
Note that destinations can be combined with link annotations to create links that are both internally and externally accessible.
    .text-position = 377, 545;
    my PDF::Annot::Link $link = $pdf.annotation(
                     :page(1),
                     :text("see Appendix I - graphics"),
                     :destination(:page(99), :name<appendix-i-graphics>),
                     :color(Blue),
                 );
Tagged Content
PDF::API6 has some basic ability to tag graphical content.
See also the PDF::Tags module, which can be used with this module and provides more functionality.
tag
my PDF::Content::Tag $tag = $gfx.tag($tag-name, &block?, *%attrs);
$gfx.tag: 'Span', :Lang<es-MX>, {
    .print: 'Hasta la vista.';
};
Create a local tag in a content stream. If a code block is given, the block’s output is marked, otherwise a marked point is made in the content stream.
mark
my PDF::Content::Tag $mark = $gfx.mark($tag-name, &block?, *%attrs);
say $mark.mcid;
Similar to the tag method, but allocates a marked content identifier (MCID)
for marked content that forms part of a document’s logical structure. Note
that marks cannot be nested.
See also the PDF::Tags module, which can be used in conjunction with this module to create Tagged PDF for accessibility and other purposes:
use PDF::Tags;
use PDF::Tags::Elem;
use PDF::API6;

my PDF::API6 $pdf .= new;
my PDF::Tags $tags .= create: :$pdf;
# create the document root
my PDF::Tags::Elem $doc = $tags.Document;

my $page = $pdf.add-page;
my $header-font = $page.core-font: :family<Helvetica>, :weight<bold>;
my $body-font = $page.core-font: :family<Helvetica>;

$pdf.add-page; # blank second page, as a target

$page.graphics: -> $gfx {

    $doc.Header1: $gfx, {
        .say('Sample tagged level-1 header',
             :font($header-font),
             :font-size(15),
             :position[50, 120]);
    };

    $doc.Paragraph: $gfx, {
        .say('Sample tagged paragraph', :position[50, 100], :font($body-font), :font-size(12));
    };
}

$pdf-save-as: "tmp/tagged.pdf";
APPENDIX
Appendix I: Graphics
The PDF standard defines a state machine for rendering graphics. There are a set of graphics operations that are used to construct content, or affect the graphics state. These are short codes that appear in a content stream (e.g. ‘cm’). PDF::Content implements a graphics engine that can execute these operations and maintain graphics state.
The graphics operations and variables accessors are mapped to (camel-cased) mnemonics that can be executed as methods on the PDF::Content $gfx object.
For example ‘cm’ is mapped to the ConcatMatrix mnemonic. Its takes a matrix array as an argument and updates the CTM graphics state variable.
Graphics are used to construct page content, as well as Form XObjects and Tiling Patterns.
Graphics operations and variables sometimes need to be used directly. In particular,
- Text State Variables - for advanced text effects
- General Graphics - for lines and colors
- Path Construction Operands - for drawing curves and lines
There are some nesting and sequencing rules for operations, including:
- There are three types of block structures, graphics, text and marked content.
- Text blocks don’t nest, or contain graphics blocks.
- Text state variables should only be used in a text block and are scoped to it.
- Other Graphics state variables should be used in a graphics block (possibly nested) and are scoped to the innermost graphics block.
- Font and text position should be set before rendering text.
- A sequence of path construction operands should be followed by a path painting operand.
PDF::Content will warn if there are any problems with operator sequencing or block structure.
Graphics Variables
Text State Variables
These are scoped to text blocks and influence the appearance and layout of text.
| Accessor | Code | Description | Default | Example Setters | Notes |
|---|---|---|---|---|---|
| TextMatrix | Tm | Text transformation matrix | [1,0,0,1,0,0] | .TextMatrix = :scale(1.5); |
[1] |
| CharSpacing | Tc | Character spacing adjustment | 0.0 | .CharSpacing = 1.0 |
|
| WordSpacing | Tw | Word spacing adjustment | 0.0 | .WordSpacing = 2.5 |
|
| HorizScaling | Th | Horizontal scaling (percent) | 100 | .HorizScaling = 150 |
|
| TextLeading | Tl | Text line height | 0.0 | .TextLeading = 12; |
|
| Font | [Tf, Tfs] | Text font and size | .font = [ $pdf.core-font( :family<Helvetica> ), 12 ] |
[2] | |
| TextRender | Tmode | Text rendering mode | 0 | .TextRender = TextMode::OutlineText |
[3] |
| TextRise | Trise | Text rise | 0.0 | .TextRise = 3 |
[1] See also the text-transform method
[2] See also the font method.
[3] See Appendix II: Enumerations - Text Rendering Modes
General Graphics - Common State Variables
These variables affect the appearance of lines and set stroke and fill colors
| Accessor | Code | Description | Default | Example Setters | Notes |
|---|---|---|---|---|---|
| CTM | The current transformation matrix | [1,0,0,1,0,0] | .ConcatMatrix: :scale(1.5); |
[1] | |
| DashPattern | D | A description of the dash pattern to be used when paths are stroked | solid | .DashPattern = [[3, 5], 6]; |
|
| FillAlpha | ca | The constant shape or constant opacity value to be used for other painting operations | 1.0 | .FillAlpha = 0.25 |
|
| FillColor | current fill color-space and color | :DeviceGray[0.0] | .FillColor = :DeviceCMYK[.7,.2,.2,.1] |
||
| LineCap | LC | A code specifying the shape of the endpoints for any open path that is stroked | 0 (butt) | .LineCap = LineCaps::RoundCaps; |
[2] |
| LineJoin | LJ | A code specifying the shape of joints between connected segments of a stroked path | 0 (miter) | .LineJoin = LineJoin::RoundJoin |
[3] |
| LineWidth | w | Stroke line-width | 1.0 | .LineWidth = 2.5 |
|
| StrokeAlpha | CA | The constant shape or constant opacity value to be used when paths are stroked | 1.0 | .StrokeAlpha = 0.5; |
|
| StrokeColor | current stroke color-space and color | :DeviceGray[0.0] | .StrokeColor = :DeviceRGB[.7,.2,.2] |
[1] See also the transform method
[2] See Line Cap Enumerations
[3] See Line Join Enumerations
General Graphics - Advanced State Variables
| Accessor | Code | Description | Default |
|---|---|---|---|
| AlphaSource | AIS | A flag specifying whether the current soft mask and alpha constant parameters are interpreted as shape values or opacity values. This flag also governs the interpretation of the SMask entry | false |
| BlackGenerationFunction | BG2 | A function that calculates the level of the black colour component to use when converting RGB colours to CMYK | |
| BlendMode | BM | The current blend mode to be used in the transparent imaging model | |
| Flatness | FT | The precision with which curves are rendered on the output device. The value of this parameter gives the maximum error tolerance, measured in output device pixels; smaller numbers give smoother curves at the expense of more computation | 1.0 |
| Halftone | HT | A halftone screen for gray and colour rendering | |
| MiterLimit | ML | number The maximum length of mitered line joins for stroked paths | |
| OverPrintMode | OPM | A flag specifying whether painting in one set of colorants should cause the corresponding areas of other colorants to be erased or left unchanged | false |
| OverPrintPaint | OP | A code specifying whether a colour component value of 0 in a DeviceCMYK colour space should erase that component (0) or leave it unchanged (1) when overprinting | 0 |
| OverPrintStroke | OP | ” | 0 |
| RenderingIntent | RI | The rendering intent to be used when converting CIE-based colours to device colours | RelativeColorimetric |
| SmoothnessTolerance | ST | The precision with which colour gradients are to be rendered on the output device. The value of this parameter (0 to 1.0) gives the maximum error tolerance, expressed as a fraction of the range of each colour component; smaller numbers give smoother colour transitions at the expense of more computation and memory use. | |
| SoftMask | SMask | A soft-mask dictionary specifying the mask shape or mask opacity values to be used in the transparent imaging model, or the name: None | None |
| StrokeAdjust | SA | A flag specifying whether to compensate for possible rasterization effects when stroking a path with a line | false |
| TransferFunction | TR2 | A function that adjusts device gray or colour component levels to compensate for nonlinear response in a particular output device | |
| UndercolorRemovalFunction | UCR2 | A function that calculates the reduction in the levels of the cyan, magenta, and yellow colour components to compensate for the amount of black added by black generation |
Graphic Operators
Color Operators
Low level setters for FillColor and StrokeColor.
| Method | Code | Description |
|---|---|---|
| SetStrokeColorSpace(name) | CS | Set the current space to use for stroking operations. This can be a standard name, such as ‘DeviceGray’, ‘DeviceRGB’, ‘DeviceCMYK’, or a name declared in the parent’s Resource |
| SetStrokeColorSpace(name) | cs | Same but for non-stroking operations. |
| SetStrokeColor(c1, …, cn) | SC | Set the colours to use for stroking operations in a device. The number of operands required and their interpretation depends on the current stroking colour space: DeviceGray, CalGray, and Indexed colour spaces, have one operand. DeviceRGB, CalRGB, and Lab colour spaces, three operands. DeviceCMYK has four operands. |
| SetStrokeColorN(c1, …, cn [,pattern-name]) | SCN | Same as SetStrokeColor but also supports Pattern, Separation, DeviceN, ICCBased colour spaces and patterns. |
| SetFillColor(c1, …, cn) | sc | Same as SetStrokeColor, but for non-stroking operations. |
| SetFillColorN(c1, …, cn [,pattern-name]) | scn | Same as SetStrokeColorN, but for non-stroking operations. |
| SetStrokeGray(level) | G | Set the stroking colour space to DeviceGray and set the gray level to use for stroking operations, between 0.0 (black) and 1.0 (white). |
| SetFillGray(level) | g | Same as G but used for non-stroking operations. |
| SetStrokeRGB(r, g, b) | RG | Set the stroking colour space to DeviceRGB and set the colour to use for stroking operations. Each operand is a number between 0.0 (minimum intensity) and 1.0 (maximum intensity). |
| SetFillRGB(r, g, b) | rg | Same as RG but used for non-stroking operations. |
| SetFillCMYK(c, m, y, k) | K | Set the stroking colour space to DeviceCMYK and set the colour to use for stroking operations. Each operand is a number between 0.0 (zero concentration) and 1.0 (maximum concentration). The behaviour of this operator is affected by the OverprintMode graphics state. |
| SetStrokeCMYK(c, m, y, k) | k | Same as K but used for non-stroking operations. |
Graphics State
| Method | Code | Description | Notes |
|---|---|---|---|
| Save() | q | Save the current graphics state on the graphics state stack | [1] |
| Restore() | Q | Restore the graphics state by removing the most recently saved state from the stack and making it the current state. | [1] |
| ConcatMatrix(a, b, c, d, e, f) | cm | Modify the current transformation matrix (CTM) by concatenating the specified matrix | [2] |
| SetLineWidth(width) | w | Set the line width in the graphics state | |
| SetLineCap(cap-style) | J | Set the line cap style in the graphics state (see LineCap enum) | |
| SetLineJoin(join-style) | j | Set the line join style in the graphics state (see LineJoin enum) | |
| SetMiterLimit(ratio) | M | Set the miter limit in the graphics state | |
| SetDashPattern(dashArray, dashPhase) | d | Set the line dash pattern in the graphics state | |
| SetRenderingIntent(intent) | ri | Set the colour rendering intent in the graphics state: AbsoluteColorimetric, RelativeColormetric, Saturation, or Perceptual | |
| SetFlatness(flat) | i | Set the flatness tolerance in the graphics state. flatness is a number in the range 0 to 100; 0 specifies the output device’s default flatness tolerance. | |
| SetGraphics(dictName) | gs | Set the specified parameters in the graphics state. dictName is the name of a graphics state parameter dictionary in the ExtGState resource sub-dictionary | [3] |
[1] See also the graphics method
[2] See also the transform method
[3] See also Advanced State Variables
Text Operators
| Method | Code | Description | Notes |
|---|---|---|---|
| BeginText() | BT | Begin a text object, initializing $.TextMatrix, to the identity matrix. Text objects cannot be nested. | [1] |
| EndText() | ET | End a text object, discarding the text matrix. | [1] |
| TextMove(tx, ty) | Td | Move to the start of the next line, offset from the start of the current line by (tx, ty ); where tx and ty are expressed in unscaled text space units. | [2] |
| TextMoveSet(tx, ty) | TD | Move to the start of the next line, offset from the start of the current line by (tx, ty ). Set $.TextLeading to ty. | |
| SetTextMatrix(a, b, c, d, e, f) | Tm | Set $.TextMatrix | [3] |
| TextNextLine | T* | Move to the start of the next line | |
| ShowText(string) | Tj | Show a text string | [4][5] |
| MoveShowText(string) | ’ | Move to the next line and show a text string. | [4][5] |
| MoveSetShowText(aw, ac, string) | ” | Move to the next line and show a text string, after setting $.WordSpacing to aw and $.CharSpacing to ac | [4][5] |
| ShowSpacetext(array) | TJ | Show one or more text strings, allowing individual glyph positioning. Each element of array is either a string or a number. If the element is a string, show it. If it is a number, adjust the text position by that amount | [4][5] |
[1] See also the text method
[2] See also the text-position method
[3] See also the text-transform method
[4] See also the print and say methods
[5] string arguments should be encoded using the current font. For example:
$gfx.ShowText: $gfx.font.encode("Sample Text", :str)
Path Construction Operators
| Method | Code | Description | Notes |
|---|---|---|---|
| MoveTo(x, y) | m | Begin a new sub-path by moving the current point to coordinates (x, y), omitting any connecting line segment. If the previous path construction operator in the current path was also m, the new m overrides it. | [1] |
| LineTo(x, y) | l | Append a straight line segment from the current point to the point (x, y). The new current point is (x, y). | [1] |
| CurveTo(x1, y1, x2, y2, x3, y3) | c | Append a cubic Bézier curve to the current path. The curve extends from the current point to the point (x3, y3 ), using (x1 , y1 ) and (x2, y2 ) as the Bézier control points. The new current point is (x3, y3 ). | [1] |
| Rectangle(x, y, width, Height) | re | Append a rectangle to the current path as a complete sub-path, with lower-left corner (x, y) and dimensions width and height. |
[1] |
| ClosePath | h | Close the current sub-path by appending a straight line segment from the current point to the starting point of the sub-path. | [1] |
[1] The current-point accessor can be used to obtain the Current Point.
Path Painting Operators
| Method | Code | Description | Notes |
|---|---|---|---|
| Stroke() | S | Stroke the path. | [1] |
| CloseStroke() | s | Close and stroke the path. Same as: $.ClosePath; $.Stroke | [1] |
| Fill() | f | Fill the path, using the nonzero winding number rule to determine the region. Any open sub-paths are implicitly closed before being filled. | [1] |
| EOFill() | f* | Fill the path, using the even-odd rule to determine the region to fill | [1] |
| FillStroke() | B | Fill and then stroke the path, using the nonzero winding number rule to determine the region to fill. | [1] |
| EOFillStroke() | B* | Fill and then stroke the path, using the even-odd rule to determine the region to fill. | [1] |
| CloseFillStroke() | b | Close, fill, and then stroke the path, using the nonzero winding number rule to determine the region to fill. | [1] |
| CloseEOFillStroke() | b* | Close, fill, and then stroke the path, using the even-odd rule to determine the region to fill. | [1] |
| EndPath() | n | End the path object without filling or stroking it. This operator is a path-painting no-op, used primarily for the side effect of changing the current clipping path. | [1] |
[1] See also paint method, which encapsulates the operators in this section. For example:
$gfx.paint(:close, :fill, :stroke);   # equivalent to $gfx.CloseFillStroke
$gfx.paint(:close, :fill);            # equivalent to $gfx.ClosePath; $gfx.Fill
Path Clipping
| Method | Code | Description |
|---|---|---|
| Clip() | W | Modify the current clipping path by intersecting it with the current path, using the nonzero winding number rule to determine which regions lie inside the clipping path. |
| EOClip() | W* | Modify the current clipping path by intersecting it with the current path, using the even-odd rule to determine which regions lie inside the clipping path. |
The current clipping path is applied to the next painting or text output operation. For example:
given $gfx {
    .Rectangle: 100, 100, 125, 20;
    .Clip;
    .EndPath;
    .say: 'Clip me', :position[98, 98];
}
Marked Content
| Method | Code | Description | Notes |
|---|---|---|---|
| MarkPoint(tag) | MP | Designate a marked-content point. | [1] |
| MarkPointDict(tag,props) | DP | Designate a marked-content point with an associated property dictionary. | [1] |
| BeginMarkContent(tag) | BMC | Begin a marked-content sequence terminated by a balancing EMC (EndMarkedContent) operator. |
[1] |
| BeginMarkedContentDict(tag,props) | BDC | Begin a marked-content sequence with an associated property dictionary | [1] |
| EndMarkContent | EMC | End a marked-content sequence begun by a BMC (BeginMarkedContent) or BDC (BeginMarkedContentDict) operator. | [1] |
[1] See also tag and mark methods
Graphics Introspection Methods
Method graphics-state()
Synopsis: my %gstate = $gfx.graphics-state: :delta
Returns a snapshot of the current graphics state. Summarising the values of all of the graphics variables described above. The :delta option returns only those values that have been updated since the last .Save() (‘q’ operator).
Method gsaves()
Synopsis: my Hash @gstates = $gfx.gsaves: :delta
A summary of all currently saved graphics states. This corresponds to the the number of open Save (‘q’) operations that have not been closed with a Restore (‘Q’) operation.
The :delta option returns the differences from the current graphics state to the last gsave, and the difference between each previously saved graphics state.
Method context()
Synopsis: my $ctxt = $gfx.context()
Returns the current graphics state context. As defined in the PDF::Content::Ops::GraphicsContext enumeration. One of: Path, Text, Clipping, Page, Shading or Image.
Method ops()
Synopsis: my Pair @ops = $gfx.ops(); PDF::IO::Writer.write-content(@ops);
Returns a raw list of operations to date.
Method content-dump()
Synopsis: my Str @lines = .content-dump()
Returns a serialized content stream to-date as a list of lines
Method open-tags()
Synopsis: my PDF::Content::Tag @tags = .open-tags();
Returns any currently open marked-content tags.
Method tags()
Synopsis: my PDF::Content::Tag @closed-tags = .tags()
Returns previously closed marked content tags
Method current-point()
Returns the Current Point coordinates during path construction, as a two element list (x and y). Returns List:U if a path is not being constructed.
Graphics Tracing
The gfx :trace option enables tracing as graphics operations are executed. For example:
use PDF::API6;
use PDF::Page;
use PDF::Content;
my PDF::API6 $pdf .= new;
my PDF::Page $page = $pdf.add-page;
my PDF::Content $gfx = $page.gfx: :trace;
$gfx.text: {
    .font = $pdf.core-font: 'Times-Roman';
    .print: "Hello World";
};
Produces:
BT	% BeginText
  /F1 16 Tf	% SetFont	{"Font":[{"BaseFont":"Courier","Encoding":"WinAnsiEncoding","Subtype":"Type1","Type":"Font"},16]}
  (Hello World) Tj	% ShowText
ET	% EndText
To break this down:
- The
text()method is adding a BeginText (BT) graphics operation on block entry and a EndText (ET) method on exit. - The
font()method sets the current font object and size. Behind the scenes it has also set up a font dictionary, registered as /F1 for the font - The
print()command is displaying text using thew ShowText (Tj) operator
The following methods give an overview of the current state of the graphics engine:
Appendix II: Enumerations
Text Rendering Modes
use PDF::Content::Ops :TextMode;
$gfx.text: {
    .TextRender = TextMode::OutlineText;
    .say: "Outlined";
    # ...
}
Text is filled using the current FillColor and/or stroked using the
current StrokeColor, depending on the current TextRender mode
as listed below.
| Mode | Enumeration | Description |
|---|---|---|
| 0 | FillText | Fill text (default). |
| 1 | OutlineText | Stroke text. |
| 2 | FillOutlineText | Fill, then stroke text. |
| 3 | InvisableText | Neither fill nor stroke text (invisible). |
| 4 | FillClipText | Fill text and add to path for clipping |
| 5 | OutlineClipText | Stroke text and add to path for clipping. |
| 6 | FillOutlineClipText | Fill, then stroke text and add to path for clipping. |
| 7 | ClipText | Add text to path for clipping. |
Line Cap Enumerations
use PDF::Content::Ops :LineCaps;
$gfx.LineCap = LineCaps::SquareCaps;
| Mode | Enumeration | Description |
|---|---|---|
| 0 | ButtCaps | Square ends (default) |
| 1 | RoundCaps | Semicircular ends |
| 2 | SquareCaps | Squared and projected a half line-width |
Line Join Enumerations
use PDF::Content::Ops :LineJoin;
$gfx.LineJoin = LineJoin::RoundJoin;
Mode | Enumeration | Description —- | ———– | ———– 0 | MiterJoin | Fully extended joins (default) 1 | RoundJoin | Rounded joins 2 | BevelJoin | Truncated joins (similar to ButtCaps)
Appendix III: Text Block Special Characters
The following Unicode characters can be used to control layout and formatting by the print and say methods.
Spacing characters
| Character | Description |
|---|---|
| \c[SPACE] | Regular space |
| \c[EN SPACE] | .5 EM |
| \c[EM SPACE] | 1 EM |
| \c[THREE-PER-EM SPACE] | 3 EM |
| \c[FOUR-PER-EM SPACE] | 4 EM |
| \c[SIX-PER-EM SPACE] | 6 EM |
| \c[THIN SPACE] | .2 EM |
| \c[HAIR SPACE] | .1 EM |
Line breaking control
| Character | Description | Usage |
|---|---|---|
| \n | Logical new-line | line-break in :verbatim mode, regular space otherwise |
| \c[NO-BREAK SPACE] \c[NARROW NO-BREAK SPACE] \c[FIGURE SPACE] | Regular, narrow and digit-width non-breaking spaces | |
| \c[HYPHEN] \c[HYPHEN-MINUS] | regular hyphenation | |
| \c[HYPHENATION POINT] | Potential hyphenation point within a word | |
| \c[ZERO WIDTH SPACE] | Zero-width breaking space | Word breaking |
| \c[WORD JOINER] \c[ZERO WIDTH NO-BREAK SPACE] | Word joiners | Word joining |
Bidi Control
A number of Unicode bidirectional control (BiDi) characters are enabled, if the Text::FriBidi is installed.
Bidi control character include \c[LEFT-TO-RIGHT EMBEDDING], \c[RIGHT-TO-LEFT EMBEDDING], \c[POP DIRECTIONAL FORMATTING] and other characters in the ranges x2066..x2069 and x202A..x202E.
The :!bidi option can be been used to disable BiDi processing, or to silence warnings if Text::FriBidi is not installed.
Appendix IV: Module Overview
                PDF::API6
                    |           FDF
                    |            :
3.              PDF::Class.......+
                    |
                    | ..<... PDF::Tags
                    |
2.              PDF::Lite
                    |
                    | --<--- PDF::Content
                    |
                    | ..<... PDF::Font::Loader
                    |
                    |
1.                 PDF
                    |
                    | --<--- PDF::Grammar
There are three levels underlying PDF::API6. From bottom to top, these are:
- PDF handles the physical structure of a PDF, including object indexes, encryption, data dictionaries and arrays and the packing and unpacking of stream content. PDF files can be created read and updated.
As well as loading PDF files, the PDF module can load FDF files, which are a closely related, but simpler format with the same syntax, commonly used to maintain form data associated with a PDF. There is a special-purpose FDF module for this format.
- PDF::Lite use to implement basic PDF content and graphics. This includes methods for page manipulation, images, xobject forms, graphics, simple colors (RGB, CMYK and Gray-scale) and core-fonts.
The optional PDF::Font::Loader can be used to load Type-1 and Free-Type fonts for use by PDF::Lite or above.
- PDF::Class is a comprehensive set of classes that understand most of the commonly used objects in a PDF, including fonts, interactive features, tagged PDF, AcroForm fields and annotations.
The optional PDF::Tags module is applicable to PDF files that are ‘Tagged’. It presents a DOM like interface for reading document structure elements.
PDF::API6 is a lightweight class that inherits from PDF::Class. It provides sugar and extra functionality for common use cases such as colors, outlines (table of contents) and preferences.